Expedition Zones
This is the heart of CryptoMines: Relive. Everything else, the Hangar, the Black Market, the Marketplace, exists to get you here. You pick a zone, you commit Cargo, you send your fleet, and you wait.
The waiting is the part that gets you. If you've done this before, the feeling comes back fast. The sectors haven't changed. They've been out there the whole time, dark and patient, waiting for the next fleet to show up.
Four extraction zones are available, each with completely different sector conditions. Before you deploy, every zone shows you what you need to know: Max Cargo you can commit, maximum extraction potential, and risk level.
Any fleet can deploy to any zone. There's no gate, no minimum requirement. The difference between zones is what comes back. Higher-difficulty zones produce more items with higher rarity, which means the extraction multipliers climb significantly. But so does the chance of losing everything.
That's the deal.
The Zones
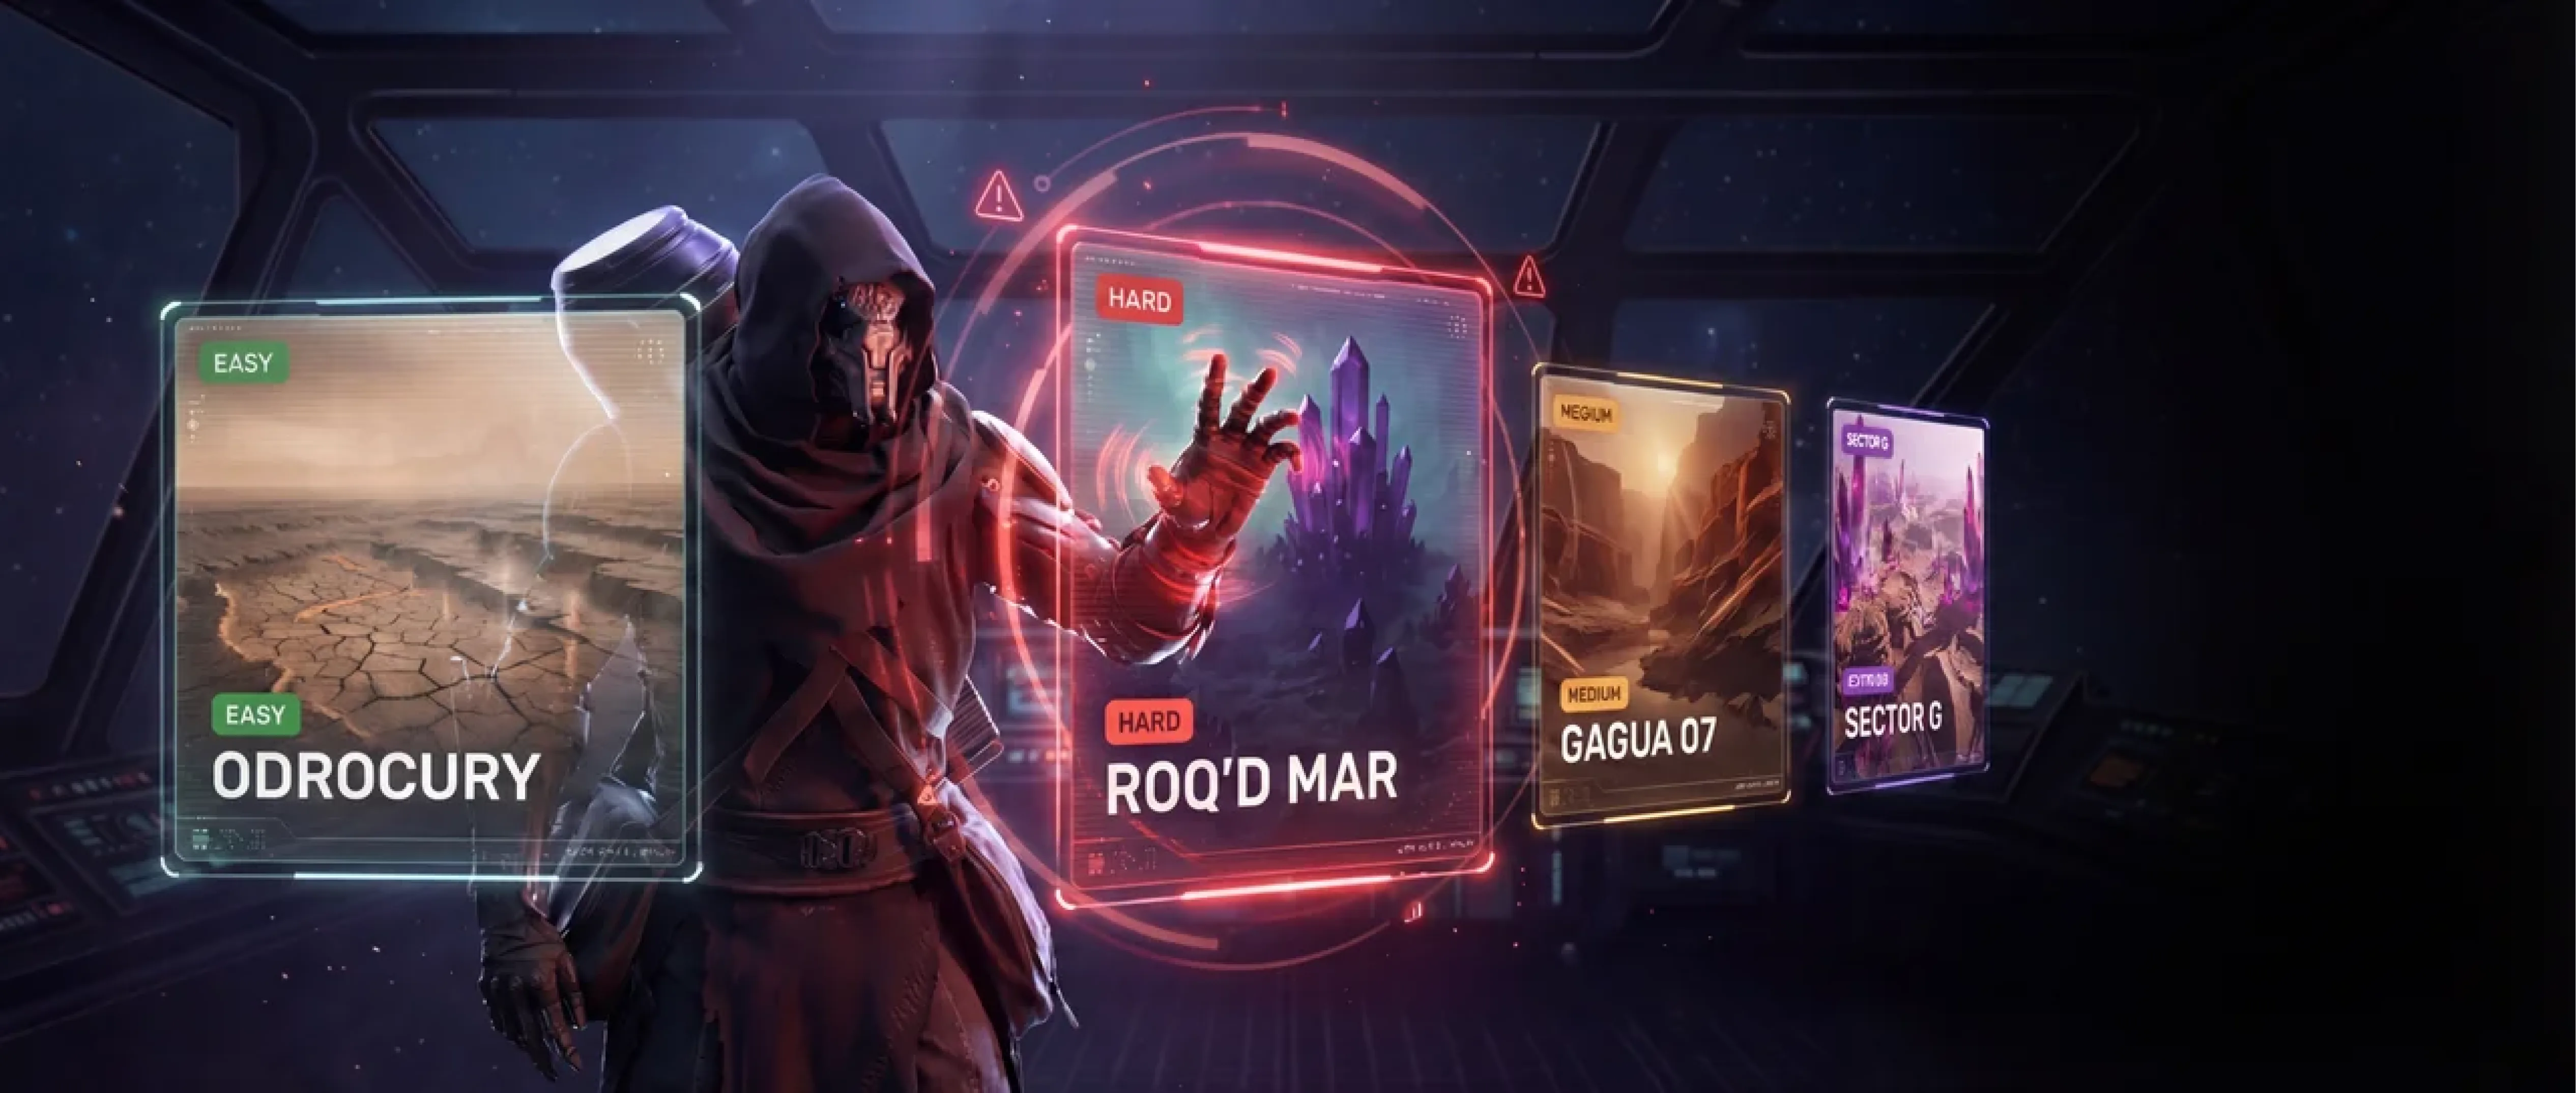
Odrocury (Zone-01) — Easy 
Low-opposition sector. Calm conditions. Your fleet almost always comes back with something.
If you're new, if you're coming back after a long time, if you just want to feel the loop before you commit to anything serious, Odrocury is where you start. If you were around for Legacy, this zone will feel like coming home, same calm, same rhythm, same quiet confidence that your crew will make it back. The items are mostly Common-tier and the quantities are modest, but the consistency is what matters here. You'll learn how the Mission Log reads, how fuel consumption works, and how it feels to send a fleet out and wait for it.
Max extraction potential: 6x. It's not where you get rich. It's where you get steady.
Roq'd Mar (Zone-02) — Medium 
Contested space. This is where the opposition starts to feel real.
The item pool shifts here. Uncommon and occasional Rare drops show up alongside Common ones. The quantity per run increases too. Some deployments come back strong. Some come back light. Some don't go the way you planned. This is the zone where you start understanding why they call it Risk-to-Earn.
Max extraction potential: 25x. Mid-game territory for Commanders who understand the loop and want better drops.
Gagua 07 (Zone-03) — Hard 
Hostile territory. This is where the game changes.
The item pool includes Rare and Epic drops, and the quantity per successful run is noticeably higher. But you need to be comfortable with something: some fleets aren't coming back from Gagua 07. When your crew makes it through, they carry serious value. When they don't, it hurts. There's no way around that.
Max extraction potential: 60x. This zone is for Commanders who've accepted that losses are part of the operation.
Sector G (Zone-04) — Degen 
Deep hostile space. The most dangerous zone in CryptoMines: Relive.
If you're reading this and something in your chest tightened a little, good. That's the right reaction. Sector G is brutal. Fleet destruction is common. Most deployments don't come back. But the ones that do? Epic and Legendary drops, maximum item quantities, and extraction multipliers that dwarf every other zone in the game: up to 120x.
Sector G is for Commanders who know exactly what they're sending in, and have already made peace with what might not come back.
Warning
Sector G has the highest fleet loss rate in the game. Don't deploy here unless you understand the risk. There are no safety nets in deep hostile space. There never were.
Reading the Map
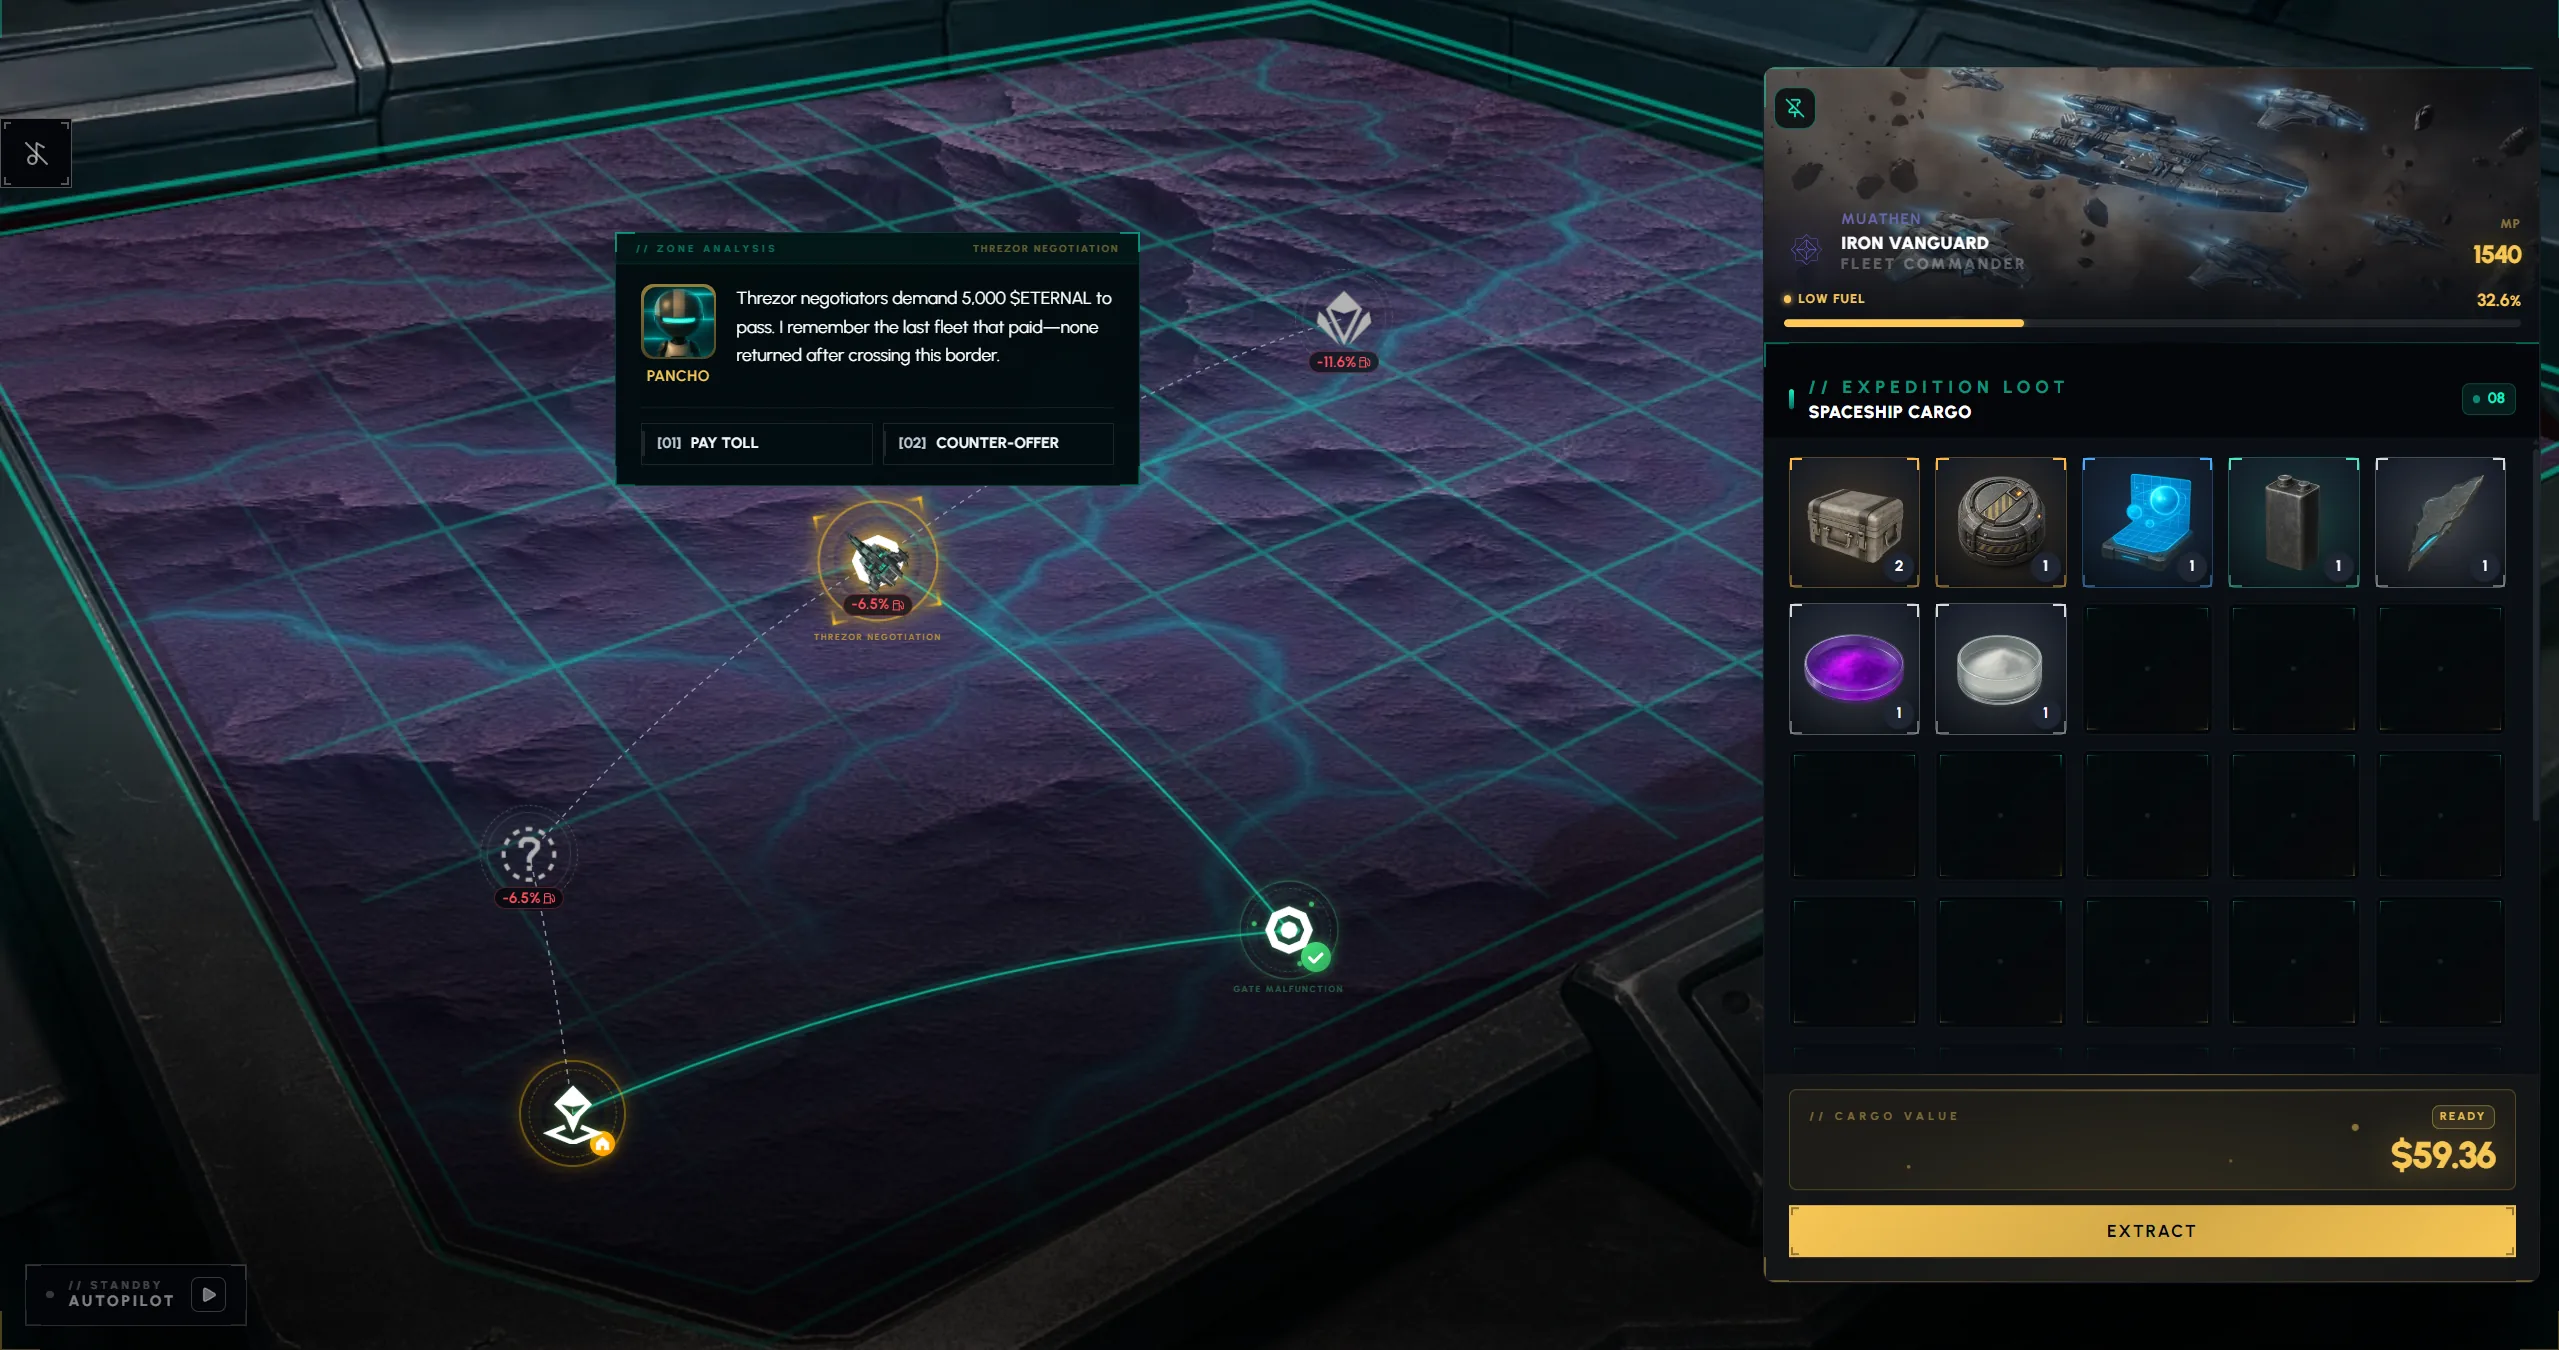
The expedition screen shows you everything you need:
- Left side — the sector map. Your fleet position, available nodes (marked with ?), paths connecting them, and the fuel cost of each path displayed in red
- Right side — your fleet panel. Fleet name, faction, MP, fuel gauge, and the Expedition Loot cargo grid showing every item you've picked up so far
- Cargo Value at the bottom of the loot grid — the running total of what your collected items are worth
- Extract — always available. One click and you're out with whatever's in the grid
Node names appear as you navigate — things like "Reborn Inspection" or "Pre-Burn Transmission." Each one is a location in the sector with its own loot table. Some nodes connect to multiple paths. Some are dead ends. The map is different every time.
After the Expedition
When you extract, the items in your cargo grid become yours. Head to the Black Market to convert them into Cargo. Then you decide: run another expedition, try a different zone, play Warp Drive or Wick's Dice, or exchange your Cargo back to USDC and walk away.
Mission Log
Every expedition is tracked in your Mission Log. It's your black box. Every fleet you sent, every zone you chose, every extraction that worked and every one that didn't. The log records:
- Total deployments, successful extractions, and failed missions
- Total Cargo extracted across all expeditions
- Per-mission details: status, percentage change, and recovered value
Green entries mean EXTRACTED. Red entries mean it didn't go well. The Mission Log doesn't sugarcoat anything.
Over time, your Mission Log becomes the story of your career as a Commander. Every decision, every risk, every outcome. It's the most honest thing in the game.